Want to learn how to distress a table? Its super easy and fun! All you need is paint, a sander, and a little elbow grease. Read below to see how I did it…
Bartering is a great thing.
We had some leftover black floor tile from our house build and traded a bit of it for a cute little wood table to replace the horribly worn cheap hand me down table we already had. Yay for free stuff!!
The table is about 3×5 feet large, and fits our 4 black “Threshold by Studio McGee” dining chairs well. It is pretty sturdy and boxy, which matches the style of our house.

Our dining room is really meant to hold a large harvest table. But since we only have 4 in the family at this point, a small table suits us fine for now.
The only problem this table had was a few paint stains and it’s color. It was a redish-mahogany-ish brown, and our kitchen is black, antique white, and a very medium neutral warm oak brown.
We already have a farmhouse-y white bench in the room that is distressed and shabby, so I decided it would be a great idea to do the same to this table to tie the rooms together. I’ve never attempted to distress a table before though…
Spoiler, it turned out awesome!

Refinishing this table was really fun. And it was so easy! I suddenly feel the need to refinish all the furniture…
How to distress a table – white Farmhouse style!
First I moved the table into the garage (without any help, now that was a challenge) and used an old shower curtain liner to protect the floor.
Initially I attempted to strip the table with citristrip. I wanted the paint to stick really well and I thought removing some of the glossy stain would help, but for some reason the citristrip did NOT work on this! I’ve used citristrip on other projects and it worked perfectly, so I don’t really know what voodoo went on here, but the stain on this table was impenetrable.

So that ended up being kind of a waste of time and a gummy mess.
After painstakingly figuring out how to get all that gummy citristrip off, I painted the entire table white using the same leftover paint we used on our walls: Sherwin Williams Bohemian Lace white. It is a latex paint which worked fine for this project but since it was kind of stretchy it was slightly difficult to sand off later. I wonder if an oil based paint would have chipped off better…
After painting the table I sanded it down using my Dewalt Random Orbit Sander and 60 grit sand paper. I then painted it with a second layer to make sure it was a very opaque finish.
Sanding and distressing the table
Attack the table with the sander!
The bench I mentioned earlier that I was trying to ‘match’ is distressed very subtly. It has light-medium sanding and looks gently worn. For the table, I wanted more of a statement piece that was super rustic and totally shabby chic.

I sanded that thing like crazy!!
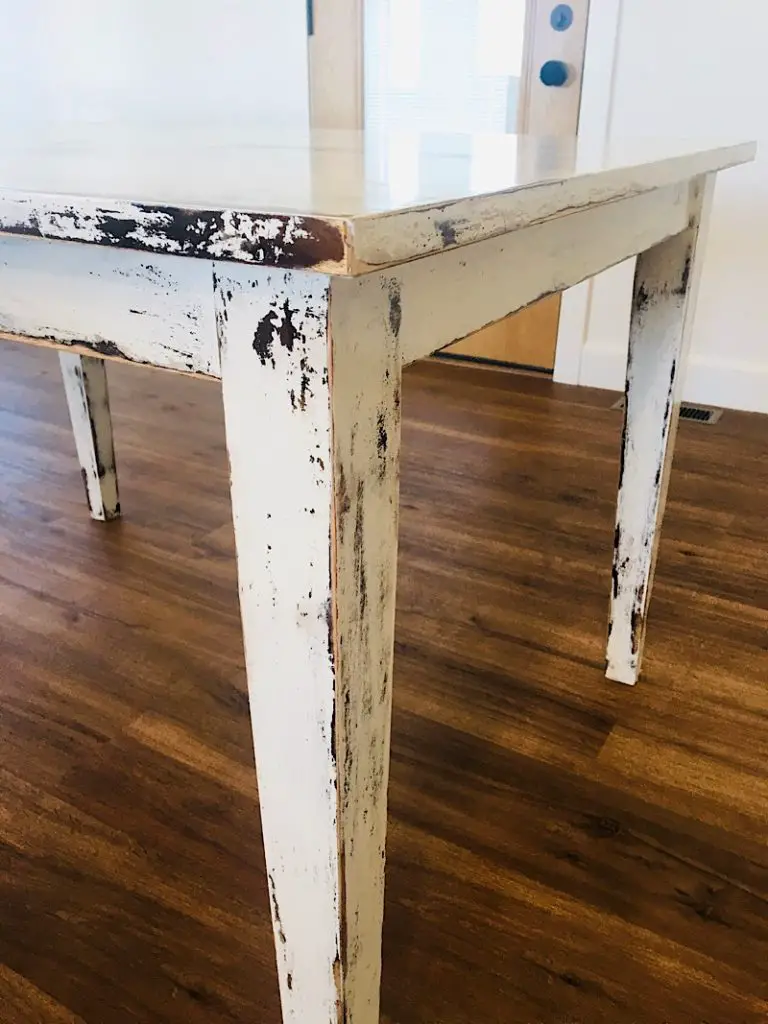
First I used several sheets of 60 grit sand paper all over the table. I made sure to take off the paint layer AND the stain layer to get down to the original wood. Looking back, I am SO glad I did this, it gives it a two toned wood look with lots of dimension and character.

After I was happy with the amount of distress, I sanded it all again with 80 grit paper, then 120, then 220 until it was buttery smooth and perfectly worn through.
There are bare spots, faded spots, chipped spots, all of the above.

To be honest I was really afraid when I started that it wasn’t looking quite right, but I just kept going and it really started to shine!
I sanded it a few times with the 220 grit paper. After that, I sealed it with a clear coat water based sealer from Minwax.

It looks milky in the can but dries crystal clear and gives the table an extremely polished look. I did two coats.

The sealer really took the table to the next level in my opinion. It is easy to wipe down, easy to clean, super smooth and totally contained from additional chipping. Not to mention that it looks like a million bucks. 😁 It really does look like a custom piece, I am so proud of how it turned out!


These photos don’t do all the texture any justice. It is gorgeous.

I realize the distressed white paint trend is very 2011…. but I don’t care. I still love it.


The dining room is pretty empty, so we will have to tackle that huge blank wall behind the table next.


Here you can see the famous red couch I reupholstered in the background… read about how I transformed that old thing here!


I could probably post 100 photos, so I will stop there! Hopefully I will have more furniture refinishing projects to share in the near future. I hope seeing my process will help you learn to distress a table too!
Like this project? Here are some more Shabby Farmhouse Decor Projects I have done!


Pingback: Coffee & Conversations | Hammers N Hugs