
Did you know you can easily make your own delicious creamy yogurt at home? I’ve done it for years! Let me teach you the surprisingly simple method of how to make homemade yogurt!
This post may contain affiliate links. As an affiliate, I make a commission on qualifying purchases at no extra cost to you. See Disclaimer for more details.
Yogurt making is very simple, and saves a lot of money.
One gallon of whole milk is less than $3 around here, and depending on how much I strain it gives us about a gallon of yogurt.
A 32 oz container of plain yogurt costs about $2.
It would cost me $8 to buy a gallon of yogurt from the store, which means I save $5!

But there are even more reasons to make yogurt…
- Making yogurt reduces waste! (Use up that extra milk before it goes bad!)
- Making yogurt teaches food preservation and self sufficiency
- Yogurt adds lacto-fermented probiotics to your diet
- Homemade yogurt tastes better (to me 🙂 )
- You can control how much sugar (if any) you add!
- Making your own yogurt saves you money!
- Making yogurt is fun and not hard!
So basically, there aren’t really many reasons NOT to make your own yogurt! 😉

Don’t be afraid. I will teach you how!
What supplies do you need to make yogurt at home?
- milk
– (I like to use whole milk because it tastes the creamiest when it’s done, it is also thicker, but you can use any kind of milk.
– If you have raw milk, it will taste even better but note that you will be pasteurizing it in the cooking process. (I have not yet mastered raw yogurt, hopefully someday we will get a cow and have an endless raw milk supply.) - a yogurt starter
– (For the starter you can buy a small container of PLAIN yogurt (Greek or regular), use a saved bit of yogurt from your last batch (this is what I usually do, it even works if you’ve frozen it.) or even buy a powdered yogurt start online.) - a thermometer
– (Some experienced yogurt makers learn to check the temperature by watching and feeling the milk with their finger, but I recommend starting with a thermometer.) - optional:
– a yogurt strainer or cheesecloth to make your yogurt thicker. (I use and LOVE this cheesecloth, I have tried other brands but this is the best. It’s a fine weave that lasts a long time and is strong and soft.)

How many hours does it take to make homemade yogurt?
Yogurt making takes all day, but it is not all hands on.
While heating and cooling the yogurt, it just needs to be checked intermittently, and when it incubates you shouldn’t check it at all.
The actual hands on time is probably about 15 mins or so, the rest of the heating/cooling/incubating time is about 9-18 hours.

How To Make Homemade Yogurt
There are four steps to making yogurt at home.
1. Heating
2. Cooling
3. Adding Culture
4. Incubating
Step 1. Heat the Milk
Pour the milk into a stock pot. I usually make a gallon at a time, but you can make more or less.

You will need to heat your milk to about 185 degrees. This makes sure there are no competing cultures or bacteria in your milk.
Use a medium heat setting, and stir it every now and then.
If you heat it a little too fast or don’t stir it enough, the milk will scald on the bottom of the pot.
But that’s okay! It isn’t ruined. What I do in that situation is stir the milk without scraping the bottom of the pot to prevent little bits from floating around.
I tend to just allow it scald a little bit because its faster and I’ve never had any trouble.😂
(But if you do accidentally scald the milk and then scrape the bottom of the pot, that’s okay too.) I’m probably the worlds laziest yogurt maker and my results are still great!
When the milk approaches 185, you will start to notice lots of tiny frothy bubbles, as well as HEAR it start to make a low rumbling noise. That is the milk starting to evaporate.

In yogurt making you never let the milk get to a rolling boil, but it will start a very soft evaporating boil.
Once your milk reaches around 185, take it off the heat.

Step 2. Cool The Milk
You now need to let your milk cool to about 110 degrees so that when you add the yogurt starter, the temperature won’t kill the good bacteria.
Immediately after removing the milk from the heat I usually set a timer for 30 mins, then go work on something else.
When the timer rings, I check the milk temperature, stir it, and set another timer for 20 minutes.
Then I come back, stir it, check the temp, and set another timer for 10 minutes.
Eventually I come back to check the temp every 5 or 10 minutes so I don’t accidentally let it cool too much below 105-115
(But if it does cool too much, that’s okay, just heat it up gently again!)
Once your milk reaches about 110, it’s time to add the yogurt culture.

Step 3. Add the Culture
When I use a bit of plain yogurt as the culture, I add about a TB or 2 per quart of milk, which means about 1/4-1/2 cup per gallon.
I have personally never used a powdered starter before, so I can’t give directions on that. Follow the instructions on the bag, if they have some 🙂
After adding the yogurt starter, you gently stir the milk to mix it in. Don’t go crazy, you want to treat these little bacteria friends nicely so they will like you and turn into yogurt. 🙂
Step 4. Incubate The Yogurt
After adding the culture, you have to incubate the mixture to let it do its magic and turn into yogurt! The goal here is to try to maintain the 110 degree warm temperature for as long as possible.
There are many ways to do this, and I have had success using many ways.
- Pour the milk into quart mason jars, and place the jars in a cooler. (If there’s extra room in the cooler you can add extra jars full of warm water, and towels.)
- You can pour the milk directly into a small lunch cooler and wrap it in a towel.
- Leave the milk in the pot, wrap the pot in a towel, and place it in the oven to keep in the heat. (Just remember not to turn on the oven later…ask me how I know…)
Every yogurt maker prefers a different method. Lately I have been using the third method. (Update, after a minor burned towel incident I have reverted to the cooler method until my nerves are restored 😂)
All you have to do is put the lid on the pot, wrap it in a thick towel or two, and place it in the oven.

Sometimes I turn the oven on for 30-60 seconds before putting the pot and towel inside, just to pre-warm the air a little.
If you do this, don’t forget to turn the oven off, and don’t let it get hotter than 110 degrees. You don’t want to kill the yogurt!
Then, you close the door and let it sit for 8-12 hours.

*I like to leave the extra oven rack on top of the stove to remind me to check it later.*
Sometimes I’ve accidentally forgotten about it and it sat for 18-24 hours, and it was still fine.
I recommend to not open the door before 8-12 hours, you’ll let the heat out!
When it’s done and you open it up, you will see the thick yogurt and liquid whey. That means you did it!
Not too hard!
Straining Homemade Yogurt
What makes yogurt greek?
Greek yogurt is simply plain yogurt that has been strained. The removal of the extra whey thickens the yogurt and makes it very high in protein.

To strain your yogurt and make it into more of a thick Greek yogurt, you can use a fancy yogurt strainer or some fine cheesecloth.
I use the cheesecloth method, and here is how I do it:
- Lay a layer or two of the cheesecloth overtop a large empty bowl.
- Carefully ladle the yogurt onto the cheesecloth.
- Bring up the 4 corners of the cloth and tie them together
- Carefully hang the cloth from a spoon set overtop a tall pot. (Don’t let the bottom of the cheesecloth touch the bottom of the pot, it needs room to drain)
- Place in the fridge for a few hours.
- (Alternatively, you can set the cheeesecloth in a strainer or sieve and place that into a bowl, then put in fridge)
(Side note, this cheesecloth is also what I use to cover my salad bowls in the fridge to keep them from getting soggy!
After straining, you will end up with a liquid called whey. Whey is very healthy and I like to keep it in the fridge to use for other recipes. Here is a great post all about whey from The Prairie Homestead.


Flavoring your yogurt
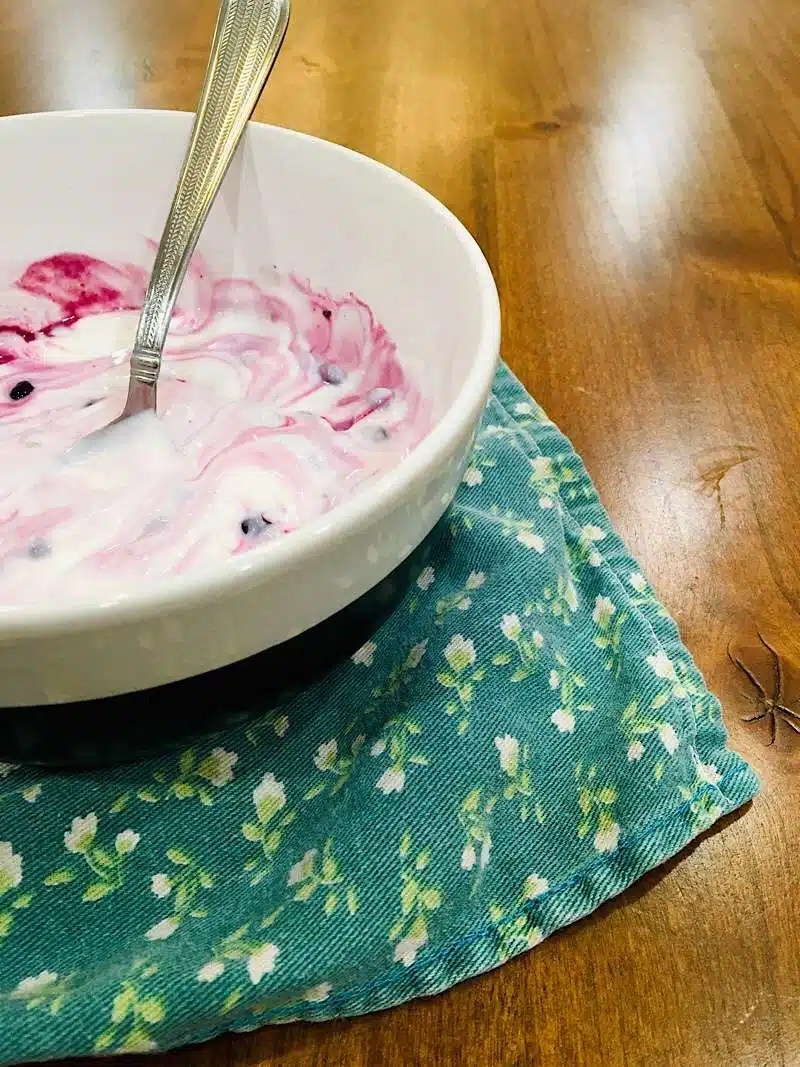
We like to eat our yogurt plain and add berries or honey. Try adding some Raspberry Powder for an easy upgrade!
Fun Fact: according to the ‘yogurt’ article on Wikipedia, “In ancient Indian records, the combination of yogurt and honey is called “the food of the gods”. Agreed!

I am still experimenting with my favorite recipe for sweetened vanilla yogurt.
The possibilities are kind of endless!

The yogurt making process is surprisingly easy and actually quite forgiving, but I have had failed batches 1 or 2 times.
What causes a failed yogurt batch?
Among other things, a few common reasons your yogurt might not have ‘set’ include:
- You didn’t let the milk cool before adding the starter
- You didn’t maintain a warm enough temperature while incubating
- Your culture starter was too old
- You didn’t let it incubate long enough

If your attempt fails, try not to cry. When this happens to me I usually smell the milk to make sure it doesn’t seem ‘off’ or bad, then use it in cooking, freeze it, or try the whole thing again.
Once, after a failed yogurt batch, I restarted the process using the same milk and accidentally made my first batch of ricotta! It was awesome…
Yogurt making is not hard! It’s one of those skills that sounds intimidating, but is actually so simple.
Let your kids help you make it, they will love the ‘magic’ that turns milk into yogurt. What an easy way to help them eat healthy!


Homemade Yogurt
Equipment
- Digital Cooking Thermometer
- Yogurt Strainer or Cheesecloth
Ingredients
- 1 Gallon Whole Milk (you can use skim, but it won't be as sweet or thick)
- 1/2 Cup Plain Yogurt (this is your starter. you can also use a powdered yogurt culture instead)
Instructions
- Pour milk into a pot. Gently heat until it reaches approximately 185°. While it is heating, make sure to stir frequently and check the temperature every few minutes.
- Once the milk has reached 185°, remove it from the heat. Let it cool until it reaches 110°-115°. You can set a timer to check it every 10-30 minutes until it reaches the proper temperature.
- Once the milk has cooled to about 110°, stir in 1-2 TB of plain yogurt per quart of milk.
- Incubate your milk for 8-12 hours. To incubate, you can pour the milk into mason jars, put on the lids, and place them in a cooler. Or you can keep the milk in the pot, put on a lid, and place it in a slightly warmed oven. You need to try to maintain the 110° temperature as long as you can.
- When the yogurt is completed, you can refrigerate it and eat it as is, or strain it for greek yogurt.
Additional photos for your yogurt inspiration:


If you need additional help, I am happy to help you troubleshoot!
Make sure to make my amazing Homemade Honey Granola with this yogurt!
Check out my other great breakfast and snack recipes:
- The Easiest & Most Rustic Loaf of Banana Bread
- Honey Whole Wheat Oatmeal Raisin Smash Cookies
- Quick & Delicious Breakfast Casserole


Good information here!
I make plant-based yogurt and I really appreciate how economical it is, compared to store-bought.
I make mine like you do, then slide it into the oven with just the pilot light on (tiny RV oven with no space for a bulky towel).
I find that eating yogurt, and drinking the whey, helps me to fight off things like yeast infections.
Sharing and posting your method.
Thanks for sharing at the Homestead Blog Hop last week! Hope you keep coming back!
Laurie
https://www.ridgehavenhomestead.com/homemade-vegan-yogurt-yes-you-can-do-it-yourself/
I’ve linked my method as well, if you are ever curious.
🏡
That’s great thank you, I haven’t tried plant based yogurt yet so I will take a peek!
Storebought yogurt doesn’t even come close to homemade! Thanks for sharing at The Homestead Blog Hop – hope to see you there again soon!
I use a crockpot to make mine–a half gallon of milk heated on low for 2.5 hours, then cooled in the unplugged pot for 3 hours. Add starter, wrap the whole thing in a large towel or blanket and leave it to incubate overnight. I’m always amazed in the morning when the whole thing is still warm inside the blanket!
Oh that is such a good idea! I haven’t tried the crockpot method because I dont have a crockpot! (shocking, I know!) I am also amazed that it is still warm in the morning. Thanks for your input!